


Instructions for the correct construction of industrial wood floors and imitation wood floors
Proper construction of laminate flooring and faux wood plastic flooring not only ensures the finished floor achieves a luxurious beauty, but also increases the life of the material when used for a long time. Usually, most customers will choose a package construction service to get the floor maintained rather than doing it themselves for a long time and not ensuring the aesthetics. What is the process like?
Instructions for finishing industrial wood floors with correct technique
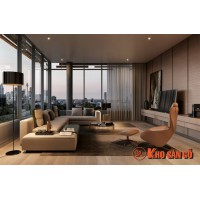
Engineered laminate flooring not only improves the life of the floor, but also significantly increases the aesthetics. Properly constructed laminate flooring will limit harmful agents such as spilled water, dirt and mold from penetrating to damage the floorboards and is not safe for long-term use. The process of guiding the construction of finishing industrial wood floors with the right techniques will support users in the most accurate construction according to the recommendations from the manufacturer.
Step 1: Treat the floor surface, spread foam rubber floor lining
In order to increase the stability of the floor to avoid broken locks and damage during use, the treatment of the floor surface before construction should always be a priority. Laminate flooring with many brands with standard thicknesses of 8mm - 12mm has uneven quality, so clearing the ground before construction increases the life of the material so that the finished floor is flat and does not make noise when use.
The foam layer for laminate flooring includes 3 types: nylon foam, silver-coated foam and young rubber foam. Spread the foam evenly on the floor and make sure the end position is 4 cm from the base of the wall for the foam to expand naturally, connect the foam together with adhesive tape after treating the convex and flat floor.
Step 2: Install laminate flooring
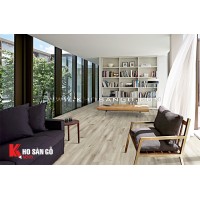
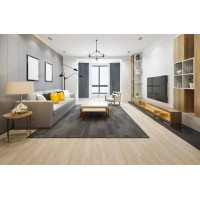
Choosing how to install laminate flooring is the first job to do, depending on the individual preferences of each person can: grafting herringbone, joining stairs or staggered to coordinate appropriate furniture. Besides, users can also choose a variety of wood colors to decorate creatively without following any criteria or standards.
After laying the floor covering for the entire area to be constructed, choose the wall angle and construction direction, usually the wood plank down in the direction of the light in the room, pairing the floor boards according to the available yin and yang joints of the product. . It is recommended to tilt the board at an angle of ~45 degrees when paired with the negative hem to ensure the most secure connection, use a rubber hammer to lightly tap the edge of the board to make sure, and then repeat the operation until the end of the floor space, making sure to Make sure the distance between the floor edge and the base of the wall is at least 1 cm for the laminate flooring to expand naturally to avoid warping and blistering of the floor.
Step 3: Install accessories – complete
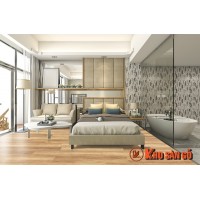
After the construction of the entire floor, the baseboards are fixed to the floor, finishing the decoration of the baseboards, connecting the wooden planks in each room space so that the finished floor achieves a luxurious beauty. Check the edges of the floorboards, handle the faulty floorboards and then clean them, the engineered wood floors can be used immediately with no harm to the user.
Instructions for completing the construction of imitation wood plastic floors with correct technique
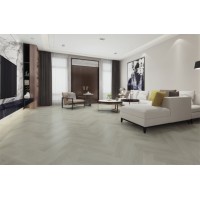
The current wood-imitation plastic floor is very diverse, including 3 main types: wood-imitation plastic floor, glue-glued imitation wood floor, and locked hemlock plastic floor with different construction methods. Customers can refer to the construction of glued plastic floors and locked plastic floors below, and with the products of vinyl flooring, just need to cut the right size of the plastic floor room and use it immediately. simple.
Step 1: Treat the surface of the floor, spread the floor lining (locked plastic floor) and apply glue (glued plastic floor).
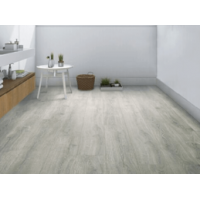
Plastic flooring is a material with low expansion because it is produced on the most advanced technological processes at present, but plastic flooring is a difficult material because it is easy to ripple if the finished floor is not really flat. Construction of plastic flooring requires handling a flat and sturdy surface after cleaning is extremely strict because if you ignore a small part of the floor, it will directly affect the life and aesthetics of the whole. floor.
The plastic floor covering for construction of vinyl flooring is similar to that of wood floors, including 3 types: nylon foam, silver-coated foam and young rubber foam. Spread the foam evenly on the floor and make sure the end position is 4 cm from the base of the wall to allow the foam to expand naturally, connecting the foam together with adhesive tape.
For glued plastic flooring, the floor material will be glued directly and fixed to the floor and choosing a quality, safe floor glue is essential to the user's health. Floor quality glue will be more stable and the service life of the floor when used will be longer. When applying, it is recommended to apply glue with an area of 35 - 40m2 to prevent the glue from drying before being glued to the floor.
Step 2: Install the plastic floor.
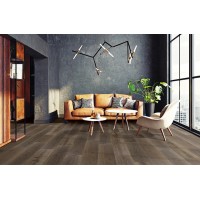
With glued vinyl flooring, after waiting for about 30 minutes for the glue to dry, the glue will turn from white to yellow, then start gluing the plastic floor. Arrange the flooring arbitrarily according to the floor design and then use a rubber hammer to lightly tap the floorboards for better floor adhesion, repeat the operation until the entire floor is installed for the area to be constructed. Note that the grain of the floorboard is oriented in the direction of the standard light to make the floor more prominent.
With the locking plastic floor, after laying the floor covering for the entire area to be constructed, we embark on detailed construction. Choose the wall angle and construction direction similar to the construction of the wood flooring above and match the floorboards according to the available yin and yang joints of the product. It is recommended to tilt the board at an angle of ~45 degrees when paired with the negative hem to ensure the most secure connection, use a rubber hammer to lightly tap the edge of the board to make sure, and then repeat the operation until the end of the floor space, making sure to Ensure the distance between the floor edge and the base of the wall is at least 1 cm so that the floor does not warp by the expansion of the material when used for a long time.
Step 3: Install accessories – complete.
Close the baseboards to fix the floor, finish decorating the baseboards, and connect the wooden planks in each room space. Wipe off the glue if any, clean the floor and wait for about 48 hours before starting to use it. With glued plastic flooring products, users must pay special attention not to pour water on the newly constructed floor and place heavy objects directly on the floor surface within 48 hours to increase durability when using plastic floors later. .


-200x200.jpg)


.png)


comment(s)